
Recipe for painting a bump map in Blender — set up the nodes, then paint the height map in Texture Paint mode.
1. Add a Bump node #
In the Shader editor (top menu → Shading), press Shift-A → Bump, then link Normal to Normal.
2. Add an image texture #
Press Shift-A → Image Texture → New, set the value to 0.5, create a new image, then link Color to Height.
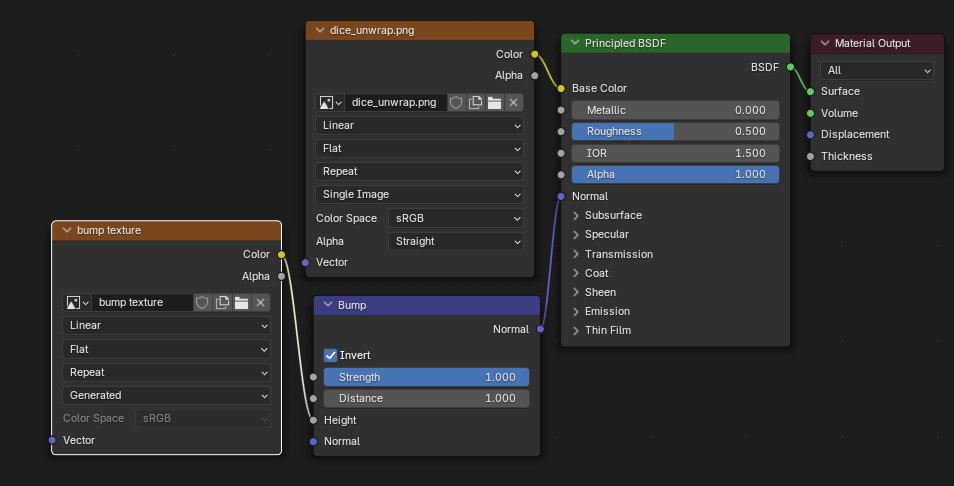
3. Paint the bump map #
Switch to Texture Paint (top menu), pick the bump texture in the top-left and top-right panels, then paint.